If you’ve ever found yourself eyeing that fancy water purifier at the store and then wincing at the price tag, you’re not alone. Clean water shouldn’t cost a fortune, and honestly, it doesn’t have to. Whether you’re prepping for a camping trip, looking to cut down on plastic waste, or just love the satisfaction of a good old-fashioned hands-on project, diving into the world of homemade water filtration might be just the thing for you.
Here’s the kicker—it’s not just about saving money (though that’s a pretty sweet perk). Making your own filter puts you in control of what’s actually filtering your water. No mystery cartridges. No sneaky subscription services. Just real materials, real function, and a surprisingly enjoyable process.
Why Make Your Own Water Filter?
Let’s get one thing out of the way: we’re not saying throw out your Brita and go full survivalist. But there’s something undeniably empowering about knowing how to filter water yourself.
Maybe your city’s tap water tastes a bit funky. Maybe you’re tired of constantly buying bottled water. Or maybe you just like knowing you’ve got a backup if your fancy filter ever fails.
And hey, if you’re into sustainable living, making your own diy water filters can be a fun and rewarding step toward reducing waste. You can often reuse household items like plastic bottles, sand, charcoal, and even coffee filters to create a pretty decent setup.
The Basic Science Behind It
At the core, all water filtration does is remove unwanted substances—whether that’s dirt, bacteria, or weird chemical tastes—from the water. Commercial filters use layers of materials to trap particles and chemical compounds. You can do the same thing using accessible materials like:
- Gravel (to catch large particles)
- Sand (for smaller bits)
- Activated charcoal (to remove chemicals and odours)
- Cloth or coffee filters (for fine silt)
Each layer has a purpose. When you stack them properly, the water flows through each level, leaving the gunk behind. Simple science. Real results.
A Basic DIY Water Filter Setup
Let’s say you want to make a simple gravity-powered system with stuff lying around the house. Here’s a straightforward way to do it:
You’ll need:
- An empty two-liter plastic bottle
- A knife or scissors
- Clean cotton or cheesecloth
- Sand (fine and coarse)
- Activated charcoal (aquarium charcoal works well)
- Gravel or small stones
- A container to catch the filtered water
How to assemble it:
- Cut the bottom off the bottle.
- Invert it like a funnel and stuff cotton in the neck.
- Add a layer of activated charcoal.
- Add a layer of fine sand, then coarse sand.
- Top it off with gravel.
- Slowly pour water through the top and watch clean water drip from the neck into your container.
That’s it. It won’t be perfect, and it won’t purify dirty pond water into bottled spring quality, but it’s great for basic home use or emergencies.
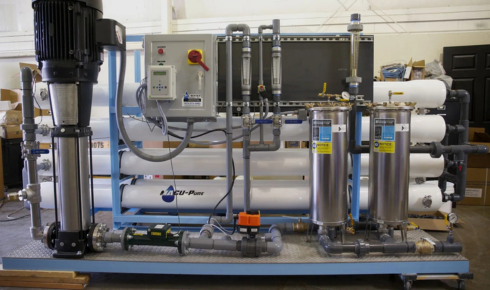
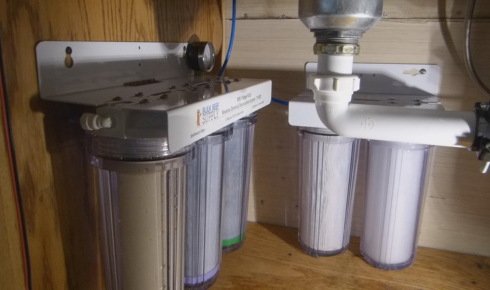
Going One Step Further: Full DIY Systems
If you’re ready to level up, building complete diy water filtration systems is entirely possible. Think a bit bigger than a bottle filter—maybe a multi-container setup with separate stages or even incorporating a UV sterilizer powered by solar panels. Some DIY enthusiasts create full household filtration units using PVC pipes, buckets, and advanced materials like ceramic filters or biosand setups.
These larger systems can remove heavy metals, bacteria, and even viruses when done correctly. It might sound complicated, but with some planning and a couple of weekend afternoons, it’s entirely within reach. Bonus? You’ll feel like a total badass when your water runs clear and clean from something you built yourself.
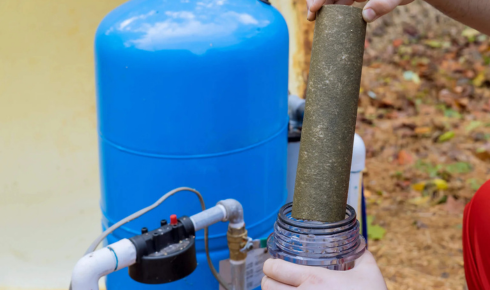
What About Reverse Osmosis?
Ah, the holy grail of water purification: reverse osmosis. It’s the same tech used in high-end systems that strip water down to its purest form. But can you do it at home?
Technically… yes. But it’s a bit more advanced. Building a homemade diy reverse osmosis system requires precision and a few specialty parts. You’ll need a high-pressure pump, semi-permeable membranes, pre-filters (like sediment and carbon), and a good understanding of plumbing basics.
It’s not as simple as a bottle filled with gravel and sand, but it’s totally doable if you’re willing to dive deep into the mechanics. Some folks even hack old RO units or buy used parts online to build hybrid systems. Just make sure you’re testing your water post-filtration to ensure it’s safe to drink.
Common Mistakes to Avoid
Even the best DIYers can run into issues. Here are a few rookie mistakes to dodge:
- Skipping the activated charcoal: This is crucial for removing chemical contaminants and bad tastes.
- Not cleaning your materials: Always rinse your sand, gravel, and any reused parts before assembling.
- Overpacking layers: Water needs to flow. Don’t cram your materials so tightly that water can’t seep through.
- Ignoring maintenance: Like any filter, your homemade system needs regular cleaning and replacing of materials.
A little care goes a long way.
Real Talk: Is It Worth It?
Short answer? Yes—if you’re the kind of person who likes to tinker, save money, and learn something along the way.
Long answer? It depends. DIY filters are fantastic as a learning experience, for emergency kits, off-grid living, or low-budget households. They work surprisingly well for everyday use too—especially if your water source is mostly clean but needs a little extra help.
Just don’t expect to match the performance of a $500 purifier unless you’re going all-in with tech and testing equipment.
Final Thoughts
There’s something deeply satisfying about turning a pile of raw materials into something that can sustain life—literally. Learning how to build diy water filters, scale them into diy water filtration systems, and even attempt a homemade diy reverse osmosis unit is more than just a fun weekend project. It’s a step toward independence, awareness, and a hands-on understanding of something we often take for granted.
And honestly? Once you taste the water from something you built with your own two hands, even the fanciest bottled stuff starts to lose its shine.